Dental Implants
A long-lasting, natural-looking replacement for missing teeth
Missing a tooth can affect more than your smile. It can change the way you eat, speak, and feel about yourself. Over time, the jawbone beneath a missing tooth begins to deteriorate, which can shift neighboring teeth and alter your facial structure.
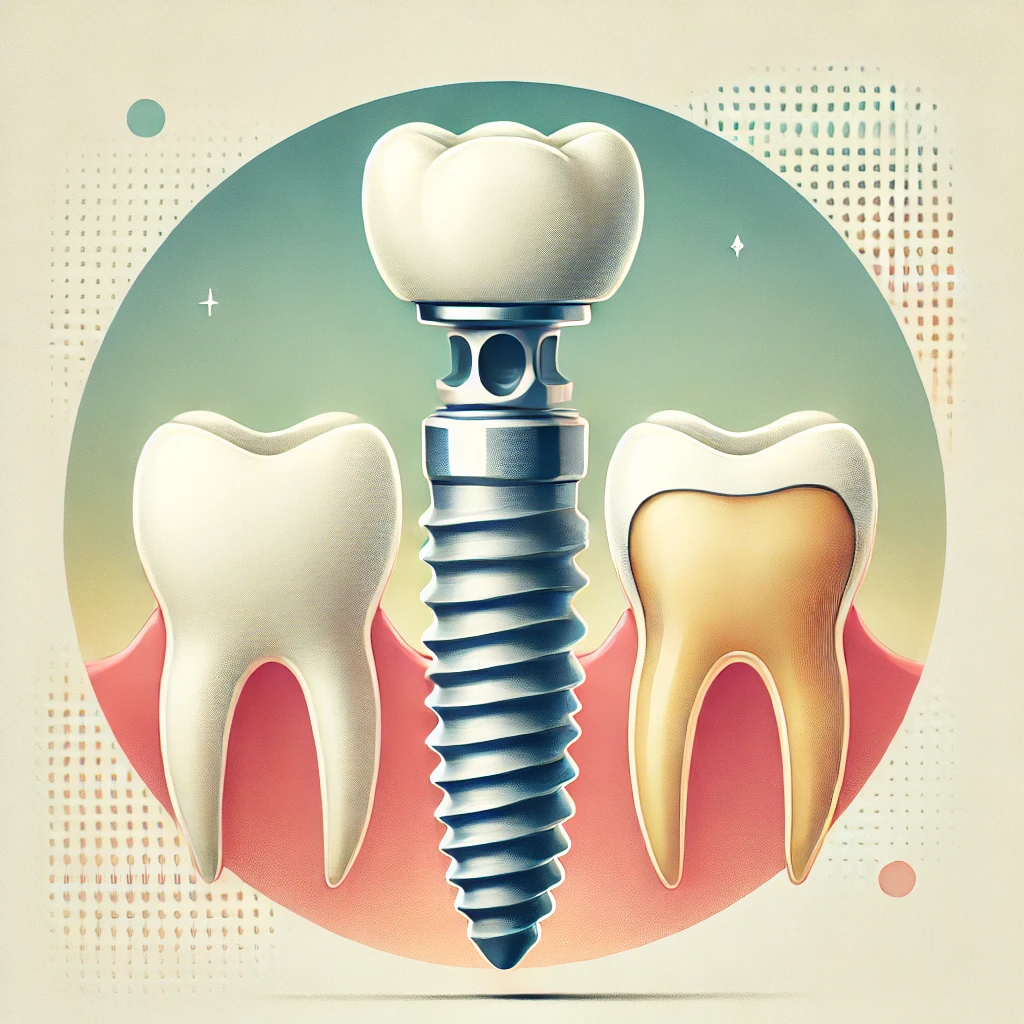
Dental implants solve all of these problems. A small titanium post is placed into the jawbone, where it fuses naturally with the bone over several months. Once healed, a custom porcelain crown is attached that is designed to closely resemble a natural tooth in look, feel, and function.
How It Works
Consultation & Scan
We take 3D CBCT images to assess your bone density and plan the precise implant placement.
Implant Placement
A small titanium post is placed into the jawbone under local anesthesia. Most patients say it's easier than expected.
Healing & Fusion
Over 3-6 months, the implant fuses with your jawbone through a natural process called osseointegration.
Crown Placement
A custom porcelain crown is attached to the implant, designed to closely match the look and feel of a natural tooth.
Frequently Asked Questions
What exactly is a dental implant?
A dental implant is a small titanium post that is surgically placed into the jawbone to serve as an artificial tooth root. Once the implant integrates with the bone (a process called osseointegration), a custom-made crown, bridge, or denture is attached on top. The result is a restoration designed to closely resemble a natural tooth in appearance and function.
Am I a good candidate for dental implants?
Most adults with good general health are candidates for dental implants. You need adequate jawbone density to support the implant, and your gums should be free of active periodontal disease. If you have experienced bone loss, a bone graft may be recommended before implant placement. During your consultation, Dr. Trivedi will evaluate your specific situation with a 3D CBCT scan and recommend the best treatment plan.
Does getting a dental implant hurt?
Most patients are surprised by how comfortable the procedure is. Implant placement is performed under local anesthesia, and sedation options are available if you prefer. Many patients compare the discomfort to having a tooth extracted. After the procedure, mild soreness and swelling are normal for a few days and can be managed with over-the-counter pain medication.
How long do dental implants last?
With proper care and maintenance, dental implants typically last many years. Longevity varies by individual, but published studies report average lifespans ranging from 10 to 30 years depending on factors like oral hygiene, overall health, and implant location. The crown on top may need replacement sooner due to normal wear. Regular dental checkups and good oral hygiene are essential for long-term success.
How long does the entire implant process take?
The total timeline from consultation to final crown is typically three to six months. After the implant is placed, a healing period of three to four months is needed for the implant to fully integrate with the jawbone. In some cases, if bone grafting is required first, the timeline may extend. Dr. Trivedi will provide a personalized timeline during your consultation.
How much do dental implants cost?
The cost of dental implants varies depending on factors such as whether bone grafting is needed, the type of restoration, and your insurance coverage. We will provide a detailed cost estimate during your consultation. Many dental insurance plans now offer partial coverage for implants, and we offer financing options to help make treatment affordable.
What are the advantages of implants over bridges or dentures?
Unlike bridges, implants do not require grinding down adjacent healthy teeth for support. Unlike removable dentures, implants are fixed in place and are designed not to slip or shift when you eat or speak. Implants also help preserve jawbone by stimulating natural bone growth, which may help slow the bone deterioration that can occur with missing teeth.
How do I care for my dental implant?
Caring for a dental implant is virtually the same as caring for your natural teeth. Brush twice a day, floss daily, and visit your dentist for regular checkups and professional cleanings. While the implant itself cannot develop cavities, the surrounding gum tissue can still be affected by gum disease, so consistent oral hygiene is essential.
Ready to Get Started?
Book online or call us at 303-841-8888. We’re here Monday–Thursday, 8AM–5PM.
Schedule Your VisitI couldn't be happier that I finally found a dentist I feel comfortable with. Dr. Trivedi is definitely a man with integrity. He explained the needed procedures thoroughly and worked out a prioritized treatment plan that works for me. The entire staff is very friendly.— Eric M.